Friday, December 29, 2006

Must Have Equipment for Shooting a Film/Video

For shooting a digital film, you will need the following equipment on your location or sets:

  • Camcorder.
  • Power Supplies. Batteries or main connection cables.
  • Video Tapes. Take four or five for a day's work, although it is unlikely that you will complete this much of shooting.
  • Camera Support. Take a Tripod and other camera accesories as required.
  • Microphones. A boom or shotgun mic should cover most situations, but take a unidirectional cardioid mic as well if you have one. A lavalier, clip-on mic will help with close-ups, or if you want to exclude other noises when recording dialogue.
  • Lights. If you only have one lamp, make sure its a powerful keylight such as a Redhead.
  • Monitor. If you want to be sure that the film you are shooting maintains the highest technical standards throughout, consider using a monitor, a small television hooked up to show what you are recording.

You can of course, carry a lot more stuff four your shooting according to your requirements. The things I have mentioned above are only the basic shooting equipment required.

Wednesday, December 27, 2006

Filming in Cold Weather

Its getting quite chilly, and I hope you're feeling the chill too, especially those in the Northern hemisphere. Why not discuss about filming in cold weather.

When using your camcorder in winter or high altitudes where it is cold, remember that the efficiencies of batteries falls considerably at sub-zero temperatures. You should therefore carry spares with you at all times when the weather is cold and, in addition, carry them in your inside pocket where your body will keep them warm. If you aren't going to be filming for sometime, take the batteries out of the camera and put them in an inside pocket, too. Its not a bad idea to invest in an insulated carrying case for your camera batteries if you intend to film in such cold weather.
Hopefully, this will help you get superior shots from your camera.

Monday, December 25, 2006

Film Editing Software: An Overview

Film Editing Software generally follow one of two metaphors: the user-friendly video workshop or the all-inclusive movie factory. Programs in the first category, like iMovie, appeal to newcomers because they’re limited in functionality and avoid complexity at every turn. These straight forward tools usually feature drag-and–drop icons and present large buttons as a way to select a desired effect. They hide their power behind a façade of simplicity. Designed to remove any intimidation from the filmmaking process, most such interfaces succeed in making editing a fun and stress-free experience.

Other video editing applications, like Adobe Premiere and Apple Final Cut Pro, hail from a long line of professional non-linear editing systems and a legacy of broadcast techniques. Their development has been years in coming, and along the way their feature sets have been both streamlined and enhanced to give editors greater control and flexibility—at the cost of complexity. These environments are not immediately intuitive (in fact, novices may find them a bit daunting); however, they do allow users to fine-tune almost every aspect of digital production. You can alter the colors of clips, the behavior of text, and almost every variable of your special effects and transitions. However, in the process the interface often becomes convoluted with cascading windows, tiny buttons and sliders, and submenus that can easily overwhelm the casual user. Making matters even more confusing, several of these popular programs have recently added compositing modules and special effects controls—both previously the exclusive domain of separate applications.


This movement toward all-in-one editors has created some two-headed monsters: programs that can do it all but demand tremendous processing power and substantial computer memory. Many of these applications also depend on the use of third-party plug-ins to extend their capabilities, which has made managing software and hardware configurations a complicated prospect.

Final Cut Pro
, for example, is a professional package with an extensive set of special effect filters and titling controls, but it doesn’t run efficiently on any Macintosh model with less than 450 Mhz speed and at least 256 Mb of RAM. Nevertheless, the software quickly made inroads in the broadcasting world because it followed many of the conventions of established editing programs and incorporated titling and composting functions previously found only in separate, stand-alone applications.


Avid’s Xpress is another example of a high-end film editing application. This software was once the industry darling, dominating most high-end post-production facilities. Until recently, the software was only available bundled with a souped-up system, completed by some proprietary enhancements. However, today’s computers can finally meet the demands of this award-winning digital video editing interface, and the Xpress DV software is now sold independently of its hardware.

Both the simple and the complex film editing program can give the everyday computer user enough functionality to create short films of full features. Pick one, and you’ll likely never need another: That’s because those drawn to simplified interfaces tend to stay away from programs with more extensive capabilities. And those who choose more sophisticated applications invest so much time in training they’re unlikely to jump to a competing product.

Friday, December 22, 2006

Handling the Camcorder

Hand-held camerawork lends footage newfound mobility, interesting angles, and documentary style vitality to your video—all of which make handheld shots a favorite for extreme sports, live news coverage, and music videos.


Since holding a camera (even a lightweight model) can quickly bog down a camera operator, many of them use support devices and grip equipment. Although there are hundreds of choices on the market, almost any rig will ease the strain of carrying the camera on long takes. In the end, however, the best camera operators learn to stand still and reserve their jerky shooting techniques for the right moments.

There’s no need to shy away from hand-held shots: most of today’s consumer-level digital camcorders have excellent built-in stabilization technology to reduce unwanted jitters. Nor should you worry too much about using products like Steadicam and gyro-based supports to smooth out motion. Your lightweight DV camcorder can easily reproduce the handheld takes produced by this type of expensive “professional” equipment.avorite for extreme sports esting angles, and documentary style vitality to your video


Tripods, Jibs, and Dollies

Serious narrative filmmakers will find a sturdy tripod an essential part of their camera package. You should also research and invest in a fluid camera head for superior pan and tilt shots.

A number of home-based businesses sell collapsible jib and dolly rigs that give the look of a professional crane in motion. These tools can help you establish excellent tracking shots and complex movement that flows freely throughout the set but is more consistent than a Steadicam or handheld shot. DV footage benefits extensively from these tools because their rigid construction prevents your camcorder’s digital stabilization features from automatically interpolating frames to correct for sudden movement.

Digital Filmmaking

Wednesday, December 20, 2006

Cinematography - III

Camera Movement

Long takes usually involve camera movement of some sort, as it would be difficult to justify a long take in which the camera was static, unless the action within the frame was sufficiently interesting to be able to hold our attention. There are four main types of camera movement: in a pan shot the camera rotates horizontally around a fixed position (often used to follow movement); a tilt shot moves the camera vertically around a fixed (typically used to indicate height); a tracking shot involves a horizontal movement of the camera in which it changes location, usually fitted to a device called a dolly that runs on rails; a crane shot enables the camera to be raised and lowered and moved horizontally. In addition to the above, it is also possible to use a hand-held camera or to utilize the zoom facility, which strictly speaking is not a camera movement but movement within the camera - repositioning the lens in relation to the aperture.

The problem with hand-held camerawork is that the shots can be unsteady, but the use of steadicam equipment can overcome this problem and provide smooth moving shots. The viewer is linked more directly to the person filming; first because we usually see exactly what he sees via the camera but also because we are reminded of their presence through the shaky camerawork.


Shot taking with a crane

Crane Shot
In Martin Scorsese’s opinion, one of the greatest shots of all time is a crane shot lasting more than a minute, used by Hitchcock in Young and Innocent (1927). In this film a murder has been committed and those investigating believe the culprit is in a ballroom; the only clue that they have is that the murderer has a facial twitch. Hitchcock gives the viewer information that the investigators don’t have with a crane shot that begins with an ELS of the ballroom, and then moves over the heads of the dancers towards the band on the stage, ending with an ECU of the drummer’s face, which begins to twitch.


A Jib on Tracks

Zoom and tracking shots
It will immediately be realized that a tracking shot is one way of bringing a subject closer by physically moving the camera nearer. However, another technique which produces a similar effect is that of a zoom, the main difference being that the camera does not physically move closer but the lens alters its focal length .But while both techniques bring the subject closer, they differ in how they deal with perspective concerning the relationship between shat is in the middle of the shot and what is at the edges of the frame.

Camera Angle

Camera angle provides another means of producing different meanings. Normally the camera angle is horizontal and at eye level: we usually communicate with each other at something approximating eye level and subconsciously expect to relate to the characters in films in the same way.

However, high and low camera angles can be used too. A high camera angle can be useful for providing a general overview of a situation. A low camera angle may be required because of the position of a character in relation to something else. High and low camera angles can also be used to represent a power relationship between characters in a film or to emphasize the subordinate or dominant nature of a character to the audience. An angled shot can also provide a distorted view.

Monday, December 18, 2006

Cinematography - II

Length of take


A still from Cinema Paradiso (1989)

If shot sizes tend to be large at the beginnings of films and scenes, an equivalent characteristic can be noted for shot duration of the length of a take. The average duration of a shot approximately 6 seconds, but introductory shots are often at least twice this length. Again, the pace tends to be slower in order to allow the viewer more time to become acquainted with characters and locations. If we look at 2 minutes from near the beginning of Cinema Paradiso (1989) we find only five shots. Within this time we are introduced to the main character Salvatore and his wife, who informs him that an old friend, Alfredo, has died. This leads into a flashback to his youth which goes on to provide his childhood memories, which constitute the bulk of the film. If we then look at a 2 minute period from the climactic section of the film, when Salvatore saves Alfredo from a fire in the village cinema, we find 52 shots. The narrative allows short takes because we know the location and characters well, and the narrative also requires short takes because the scene involves action and panic. Imagine the effect if we reversed the shot duration: 52 shots in 2 minutes to introduce characters and only five shots to cover 2 minutes of fast-moving action.

There can be other reasons for long takes in a film. Orson Welles famously and Jean Luc Goddard infamously, have used long takes. In Goddard’s Weekend (1968) one shot lasts 8 minutes and gradually reveals to us a long line of cars in a traffic jam. As well as also helping to ensure that the film is ‘alternative’, which was no doubt part of the director’s intention, the shot also helps make one of Goddard’s points about cultural life and consumerism in 1960s France-the point being that while the trend of going away for the weekend grew, it increasingly resulted in people spending the weekend in traffic jams


Welles began Touch of Evil (1953) with a shot lasts over 3 minutes. It begins with a close up of a bomb being planted in a car. The camera then rises to give us a bird’s eye view of the situation, including the car driving off. The camera tracks to catch up with the car, then drops down to enable us to hear a banal conversation between a border guard, a woman and a man. This technique builds suspense as we are expecting an explosion, which soon follows and brings the shot to a close. Being the exception to the rule begs the question, why use a long takes instead of editing together several shots covering the same action? It could be argued that in this instance we are given anoverview of what is happening in adjacent locations simultaneously as a way of providing us with the bigger picture. However, if this is the intention, then why is the technique not used more frequently?

Alternatively it could be argued that such a shot was motivated more by style than by the requirements of the narrative, which is not necessarily undesirable. For now it is sufficient to note that it is a technically impressive shot with incredible complex timing which has certainly gained a place within the study of film.

Having suggested that the long take at the beginning of Touch of Evil may be more to do with style than with content. It would be wrong to assume that this is always the case.

Depth of Field

Another aspect of cinematography is the depth of field. Depending on shutter speed, aperture and the amount of light available; a camera can focus on just a small part of what is in the frame or on the whole scene. Focusing on only part of a frame is known a shallow focus and is often used as a device for encouraging the audience to concentrate on a particular part of the scene. Conversely, seeing everything in focus, from foreground to background, is known as deep field photography or deep focus.rs its focal length.But while both techniques bring the subject closer, they diff

e us a bird'r, then drops down to enable us to hear a a close up of a bomb being planted in a car.ot is interesting ch is immediately transformed into an ECU as a c

Friday, December 15, 2006

Cinematography

As most of you must be aware, cinematography is concerned with recording the elements within the shot. While photography is the recording of a static image, cinematography is the recording of a moving image. In order to obtain the desired images, the cinematographer must attend to two areas: control of lighting and operation of the camera. The images consist of reflected light and the camera records light. Indeed, in Britain a cinematographer (the person responsible for lighting and camerawork) is sometimes known as the lighting cameraperson or as the director of photography.

Important Aspects of Cinematography

FRAMING
A key ingredient of cinematography is framing. This refers to the edges of a shot, in that framing determines both what is included and what is excluded. There is indeed a close link between framing, composition and mise en scene. Mise en scene refers to what is to be filmed and how it is arranged and therefore in effect defines what the framing will be; however, strictly speaking the framing is only realized when the shot is filmed through the camera lens.


In the Norman and Marion conevrsation scene from Alfred Hitchcock's Psycho, Hitchcock could have chosen to widen the framing so that we could se both Marion and Norman. However, this would have entailed including more height in the shot, which would perhaps have meant meaningless space and detail. The tighter framing chosen by Hitchcok means we get a mid shot of Norman's reactions as he speaks to Marion. Hitchcock nevertheless briefly gives us a long shot of both Marion and Norman at the beginning and end of the scene to provide us with a sense of spatial relationship between them.

SHOT SIZE
Shot size in turn is determined by the framing. There are many possible choices of shot but we can think in terms of five basic shot sizes with intermediate shots in between. Shot sizes can be closely tied to narrative development, notably to the progression of scenes. Typically a film, and often a scene, will begin with an extreme long shot (ELS). Just as narratives tend to begin slowly in order to acquaint us with characters and locations, so films visually use an ELS (sometimes called an establishing shot) to place things in context. An ELS allows us to see a subject in relation to her/his surroundings. Blade Runner begins with several ELSs which gradually introduce us to Los Angeles in the twenty-first century, followed by the introduction of themes and characters.

A film can begin with an extreme close up (ECU); this could be used to make us inquisitive, or it may simply be an impressive shot because of its content, but more often than not it won’t make much sense. The Good, the Bad and the Ugly (1967) famously begins with an ELS which is immediately transformed into an ECU as a character walks into shot and looks straight to camera. The shot is interesting and intriguing while also being disconcerting; however, it makes no obvious sense in the context of the film. It does not enable us to get to know the character in greater depth, which would arguably be a pointless exercise anyway as he dies a couple of minutes later. The choice of shot seems to be more to do with style and experimentation than with illustrating the narrative. Furthermore, having a character look straight to camera is usually identified as a technique of alternative cinema.A first close up is usually found some minutes into a film when we are already accustomed to characters and locations. Typically a CU will concentrate our attention on as important detail to ensure that the desired meaning is communicated, or else a CU will be used as a reaction shot to show someone’s response to an incident. It is common to find a CU of someone’s face when their expression tells us something or a CU on an object that is to have a crucial function in the film. Scream in fact begins with a potentially confusing shot, a CU of a telephone: however, we do hear a phone ringing and we don’t have to wait long for it to take on relevance. The camera tracks back to show Casey picking up the phone. These introductory shots are also soon followed by an exterior ELS (albeit a threatening one) of Casey’s home to provide us with the context.

I will continue with this topic in the next post, discussing other aspects of cinematography...

Wednesday, December 13, 2006

Problems in Hot Plugging Devices

Usually, when a camcorder is hot-plugged — or attached via FireWire cable to the computer, your editing application will automatically recognize the connection, making the video immediately ready for import. However, problems can arise - the following paragraphs cover some of the more common ones:


Some applications won’t recognize camcorders connected to a daisy chain — i.e., a string of linked FireWire devices. For example, Apple’s popular iMovie software cannot import footage from DV camcorders attached via daisy chain. Likewise, many applications will not support the simultaneous use of multiple devices connected to your computer with FireWire because of driver conflicts. Typically, an operating system will assign a FireWire port to a single application at the exclusion of all other devices; when the application is shut down, the port is released for other uses.

Although most computers with six-pin FireWire connection can supply adequate power to FireWire peripherals, this is often not the case with digital camcorders. DV cameras require their own electrical sources and must be turned on with their own batteries or AC adaptors before they are recognized by the computer and its applications. Unfortunately, the computer’s internal power supply cannot supply sufficient DC voltage to operate a camcorder.

Never unplug a FireWire cable in the middle of a capture session. Hot pluggable devices are a tremendous convenience to computer users, but disconnecting them while importing DV footage can create a variety of technical problems—computer crashes, disk errors, damaged footage, missing data, and dropped frames, to name just a few. Make sure to stop your camcorder or finish your data transfer before removing a FireWire cable.

Hope you got the point!

Monday, December 11, 2006

Why Does Your Footage Appear Blocky?


Once a computer has imported DV footage, it keeps the original source files on the hard disk and creates a series of preview frames to display in the video editing application (Avid, FCP Adobe Premiere...). These preview frames are created by removing much of the video and color information that NTSC televisions require, and simply displaying the frames as they will best appear on your computer monitor

Although these images will appear blocky, fuzzy, or more muted than those seen through the viewfinder of a camcorder, not to worry: These screen images are simply low-resolution stand-ins for the real footage. Once formatted, these preview frames will appear at full screen and full motion, and display much faster than the higher-resolution images of an uncompressed video stream.

Previews make the long and arduous task of editing infinitely more bearable by speeding the response time of video playback. Without these low-res substitutes, even the fastest computers would be unable to display motion pictures in real time. Meanwhile your full-quality original footage remains locked inside the clip by the DV codec until you’re ready to export your final movie in all its glory.

Related Posts: DV Shooting Tips

Thursday, December 07, 2006

Some Camera Acessories

Fisheye Lenses: An extreme example of a converter is the fisheye lens. Curved to a horizontal viewing angle of nearly 125 degrees, this attachment creates a high degree of barrel distortion, exaggerating the depth of scenes by pulling nearby objects closer and receding distant objects to the background. Used with lightweight digital cameras, this unique perspective often lends a sense of drama or excitement sporting events, action shots, and point of view footage from surveillance equipment.


Aquatic Housings: A number of companies design and manufacture water-proof aluminum housings for shooting video in undersea depths of up to 450 feet. Once you submerge a DV camera, however, you begin to lose proper light levels and esperience shifts in the color spectrum. For this reason many divers also use special aquatic lights, optics, and correction filters to increase color intensity and boost luminosity. Most water proof camera housing features mechanical controls that help you operate the camera functions without getting moisture into your camcorder.


Transvideo Handheld Prompter: The folks at TransVideo took their popular mattebox setup and replaced the heavy steel support rods with lightweight carbon equals, attached a 6-inch monitor to the front housing screws, and gave it some semi-reflective glass. The result is the versatile 4-pound Transvideo Handheld Prompter, ideal for crews using . Attached to a Canon XL-1, the entire system (monitor, prompter, and mattebox) weighs less than 13 pounds. Designed to work in full sunlight without a hood, the teleprompter allows the use of filters. The composite and VGA (60-Hz.) monitor can accept signals from any laptop and flip the image left, right, and upside down-necessary to view the mirrored text in the display glass. The Transvideo monitor can also be equipped with a wireless receiver and battery pack, making the same equipment useful as a client monitor on set.

Related Posts: Camcorder Lens Filters

Monday, December 04, 2006

Audio Tips for filmmakers

When you record audio, you’ll do well to keep in mind the following:


  • For large noisy sets, it’s best to use an external or wireless microphone to record dialogue. Remember: You want to record audio in the immediate proximity of actors, which means that if the camera is positioned far from the action, you’ll need to use remote microphone.

  • Plug headphones into the output jack on your camcorder and listen to the audio being recorded to determine if the levels are adequate. You should also be able to hear any interference or electrical hums that might not be noticeable without a headset.

  • Use the appropriate microphone. A lavaliere microphone is a clip-on recorder that should be placed at chest height on actors. A shotgun microphone can be used at a distance but you should always aim it at the primary speaker.
  • Always record several minutes of room tone—natural or ambient sounds of the quiet set at rest. This “clean noise” is frequently used in audio editing to fill long pauses in dialogue or to obscure annoying pops or hisses in the soundtrack.

If anyone has more audip tips they are most welcome to suggest it by commenting on this blog post. All other suggestions on digital filmmaking are most welcome.

Realted Posts: Use of Sound in Films

Saturday, December 02, 2006

Film Motion in Video Footage

Digital video footage borrows a filmic property through the use of shutter-speed controls, which change the rate at which fields are converted to frames, compacting the time between field sets and elongating the distance between actual frames. The slower the shutter speed, the more motion blur will occur in images. Thus, images captured at shutter speeds greater than 1/60th of a second show virtually no blur when projected, while those shot at 130th of a second will appear more like film.


You can also use a number of software plug-ins and applications (like Cinemotion and After Effects) to introduce motion blur into video footage to achieve a subtle amount of the movement typical of images projected on film. However, as in other digital post-production processes, your footage quality will deteriorate because of the interpolation of motion blur that occurs in such programs. For this reason, it’s better to rely on your camera’s built-in functionality to achieve these effects than to depend on the computer to fix wayward footage.

Tip

Check your camcorder for adjustments that slow down shutter speed, a digital effect that can reduce high-speed camera motion. If you feel compelled to use fast panning during your shoots, you can employ this feature to improve your compressed video

Related Posts: The Right Camera for Film Transfer

Wednesday, November 29, 2006

Essential Technology for Digital Filmmaking - FireWire

Digital movie footage is really nothing more than a series of electronic files—extremely large files—and the best way to move those files is over a FireWire cable.

It’s not without good reason that manufacturers of multimedia devices have adopted this high-speed serial data-bus technology. Offering transfer speeds of up to 400Mbps.

Firewire does more than simply connect camcorders to computers

it enables aspiring directors to incorporate myriad bold, new peripherals, such as still cameras, audio mixers, and scanners into the creative process.

FireWire also accelerates the performance of conventional equipment like hard disks and CD burners. As you venture further into digital filmmaking, you will see that the benefits offered by FireWire are monumental: Easy cross-platform implementation, simplified cabling, and hot swapping are just a few.

When FireWire was introduced, it was limited in the cable distances it allowed and its ability to capture footage directly to disk while recording. But today most of those problems have been overcome, and a number of FireWire hubs, cabling systems, DV mixers, and signal converters allow you to use multiple devices and AV inputs for live events and direct Webcasting.

Thursday, November 23, 2006

Filmmaking is expensive - Be Cautious, Prevent Uncalled Expenses

Some car chases in movies are so over the top that you might find yourself mentally trying to add up the cost of all the wreckage. Its always better to order a free online car insurance quote, simply because its helpful, and its free!

Now Progressive Direct, a unit of a U.S. auto insurer, will do the math for you. It teamed up with Universal Studios Home Entertainment to insert a running tally of the destruction into the recent HD DVD release of "The Fast and the Furious: Tokyo Drift." As cars smack into one another in Tokyo, a display in a small window keeps track: "Roof repair: $209, taillights: $451, fender: $618.' The calculator is labeled "Progressive Direct: Insurance Damage Estimates." This digital gauge is the first in what Universal and other studios hope is a stream of branded interactive features on their new DVDs. Like those released in the rival Blu-ray format by Disney, Fox and other studios, the HD DVD discs issued by Universal, Paramount and Warner Brothers have about six times as much data capacity as standard DVDs. The extra space gives the studios room for not only high- definition video and enhanced audio, but also a bevy of interactive features, including games, picture-in-picture commentaries and Web links. In their constant search for more movie revenue, studios see these interactive features as a new source of money to tap. HD DVD and Blu-ray discs and players are only trickling into the market because consumers have been waiting to see which of the two formats would prevail. As with any new marketing concept, the value of the Progressive damage calculator is difficult to know. And since viewers must choose to turn the calculator on, the number who actually see it could be small

"I can't remember the last time I or anyone I know checked out the ancillary info on these discs"

said Steven Kovsky, an electronics analyst for Current Analysis, a technology research company based in Washington. In fact, little money changed hands in this deal. In return for having its name plastered on the crash calculator, Progressive created a Web site, www.progressivefastandfurious.com, and developed contests to promote the movie and the disc. While these kinds of experiments may take time to bear financial fruit, studios and advertisers said they believed they had to find new ways to reach consumers in an age when the entertainment audience was increasingly fragmented.

CarInsurance.com's online insurance marketplace gives an opportunity to consumers and to insurance companies. They offer the ability to shop for car insurance online.

Wednesday, November 22, 2006

Shooting for the Web

Shooting video for presentation over the internet is radically different from standard moviemaking. Thus, you must consider several key dynamics when preparing your shot selections. The factors that determine how your movie will appear over the Web are governed by the video compression software used to squeeze your raw DV signal into downloadable or streaming files. The quality of Web-compressed video depends largely on the movement and luminance of your footage. To dramatically improve movies destined for the Web, consider these shooting tips:


  • Keep the action steady. Reduce the amount of fast and extended motion in your movie because high-speed action sequences result in sluggish playback.
  • Use well-lit scenes. Because dark settings present difficulties in compression, you’ll want to avoid videotaping in low-light conditions.
  • Compose for contrast. When creating compositions for the Web, contrast is more important than color because drastic compression leaves little room for color fidelity.
  • Avoid patterns. Keep details to a minimum because they significantly inhibit the compression software from reducing the final file size of your movie. Make sure you shoot against an unchanging background.
  • Use close-ups and silhouettes. Since long-shot compositions struggle to communicate subtle movement, shoot all vital action in close-ups, or silhouette them until they become clearly distinguishable when displayed inside a small window.
  • Avoid Zooming. Zooming in for close-up shots forces the computer to compress the entire frame rather than just subtle changes in facial features. Instead, have actors move closer to the camera, which doesn’t require as much overall compression.

With so many facilities and mediums to showcase your talent, its has become easier for filmmakers (especially independent filmmakers) to earn their bread and buter. Digital filmmaking is changing lifestyles!

Tuesday, November 21, 2006

Film Editing - III

Alternatives to Cutting
Other techniques can be used at the editing stage to create a seamless unity for the film, whose narrative will usually contain many scenes within the story. If scenes were edited straight up against each other, then the transition from one to another could be confusing. The usual condition is to use a fade to black and a fade from black to end and begin a scene. Fades are introduced during the editing stage. Dissolves and wipes are often used too: one shot gradually gives way to another to indicate a transition, some times from one scene to another, but more often than not this is used to indicate the passing of time.

Discontinuity Editing
If most film editing can be described as continuity editing, then it is equally true that a minority of films use discontinuity editing. As the name implies, there is no smooth flow to the shots that are edited together, there is a disruption between one shot and the next. However, discontinuity editing can be used to good effect. If continuity editing principally supports the meanings residing within the shots that represent the narrative, then discontinuity editing can be regarded as producing meanings from the ways in which the shots are linked together. The shot are not necessarily unified: rather, meaning comes from the way in which the shots interact.

Montage
The best known example of discontinuity editing is montage, which was much used by Eisenstein, most famously in Battleship Potemkin (1925) in the Odessa Steps sequence. Here the shots that are edited together do not flow smoothly; instead they clash: they conflict with each other. The sequences switches, in a spatially disorientating way, between views of the Tsar are advancing troops and views of the fleeing citizens. The troops are armed, menacing and inhuman: the citizens are unarmed, vulnerable and all too human. The juxtaposition of meanings between the shots results in new meanings, produced by the viewer on seeing the montage of shots that are pieced together.


The Odessa Steps Sequence from Battleship Potemkin

It is also possible for the pace of editing to create a rhythm which itself produces meaning. In the shower scene in Psycho there is no logical progression to the way in which the stabbing of Marion is visually presented; it is a montage of shots. The shots are short and are filmed from a variety of angles - a rhythm is set up by the editing which emphasizes the frenetic rhythm of the stabbings. The knife comes from different directions and these shots are intercut with short shots of Marion struggling. The effect of the sequence is to create a feeling of confusion, madness, panic. No doubt precisely what Hitchcock wanted.

Graphic Match
Another editing technique that can break continuity is that of linking shots containing similar visual content. The shower scene in Psycho ends with a graphic match when a camera zooms in to a close up on water swirling down the circular drain in the shower and then dissolves to a revolving close up of Marion Crane’s eyes. Shot size, movements, shapes and composition are matched.

Freeze Frame
One final film technique remains to be mentioned that is achieved at the film editing stage. The freeze frame for obvious reasons creates a discontinuity. – the moving image suddenly comes to a standstill. It is not a common technique but can be a useful device in filmmaking. In Jules et Jim (Truffaut, 1962), at one point Catherine is pretending to pose like a model. Truffaut momentarily freeze frames the shots of her poses to create the impression of a photograph.

Silver - My favourite metal

Buying gold has been recognized for centuries as one of the best ways to preserve one's wealth and purchasing power. Gold bullion is a unique investment. From the time of ancient Egyptians, Greeks and Romans to more modern times, man has had an affinity for gold bullion.

However, silver - long considered its poor sibling, is also being considered as a important form of investment. As an investment product, silver is available in coin or ingot form. There may never be a better time for buying silver bullion than right now. World demand for silver now exceeds annual production, and has every year since 1990. One of the reasons why filmmakers and photographers are shifting from celluloid/film to digital filmmaking is that silver is used in the manufacture of celluloid/film raw stock. Above ground stockpiles of silver bullion are low, shrinking rapidly and approaching zero. Silver price has been touching the roof for quite some time now. Since the end of WWII, for example, the U.S. government - once the largest stockpiler of silver on the planet - has dumped billions and billions of ounces of silver bars onto the world market, effectively depressing silver prices. Today, that government silver hoard is gone . . . and now the U.S. government is a silver buyer. For these reasons, silver bars represent an outstanding investment opportunity.

Through Monex Deposit Company (MDC) you can purchase silver, gold or other precious metals and coins for immediate personal delivery or arrange for convenient and safe storage at an independent bank or depository. For over 30 years, the Monex companies have been America's gold, silver and precious metals investment leader - having the best US silver coin prices and programs in the silver coins industry and competetive precious metals prices.

Friday, November 17, 2006

Film Editing - II

Film Editing techniques continued from the previous post:


A short student film trying to follow the 180 degree rule, shooting for
continuity, including cut-away shots.


Eye-line Match
Conversations, and for that matter any interaction between characters, will usually also require an eye-line match in order to maintain continuity between edits. It character A is in a chair looking up at character B who is standing, when we cut to a close up of character A she/he should still be looking up, even if character B is out of shot –and vice versa for a close up of character B. In other words, the direction of a character’s gaze needs to be matched to the position of the object they are looking at.

Match on Action
Another form of edit that provides additional information about an event is a match on action. Here the edit brings together two shots from different angles or shot sizes of the same action being completed. Again this gives us a slightly different perspective on an action and can often provide us with more detail through the use of a close up. We see a hand raise a gun –next we see an extreme close up of a finger pulling the trigger.

Cutaway Shots
A cutaway shot may be edited into a scene. This type of shot is not directly related to the action taking place but it has an indirect link. We may see two people having a conversation in an apartment and, while we still hear their dialogue, for several seconds we may see a shot of the exterior of the apartment before returning to the conversation. The shot cuts away from the action but still retains some connection to the scene.

Cross – cutting
Cross-cutting is an invaluable editing technique and is commonly used for. It consists of editing together shots of events in different locations which are expected eventually to coincide with each other. At the end of Lock, Stock and Two Smoking Barrels ( 1998) we are that Tom is desperately trying to get rid of two shotguns which he believer are incriminating evidence. However, we then cut to a pub where his associates have just learned that the guns are worth a fortune. Suspense is built through editing between Tom trying dump the guns into the Thames and his associates desperately trying to phone him to stop him get rid of the guns. In one respect, cross-cutting breaks the film’s continuity by suddenly jumping to another scene; however, the close linking together of the two scenes ensures coherence. action being comt is a match on action. Here the edit brings together two


Lock, Stock and Barrel (1998)

The 180 Degree Rule
There are a couple of important ‘rules’ associated with editing. The 180 degree rule specifies that the camera should not have ‘crossed the line’ of action when two shots are edited together. This is particularly important during a scene where two care interacting with each other in some way. We will have subconsciously noted that one character is on one side of the screen while the other is on the opposite side. The line of action is an imaginary line passing through the two characters. If the camera were to be placed on the other side of the action in the next shot, then the position of the characters would be reversed. It could take the viewer a second or two to realize what had happened and this might interrupt involvement in the film. In reality audiences are fairly adept at quickly ascertaining what has happened in such an edit; indeed, it is increasingly common to see the line crossed. In the café scene when Jimmy and Harry meet towards the end of Goodfellas (1990), the camera crosses the line but our involvement is not dramatically disrupted. The two ways of safely crossing the line are to either track across the line in one continuous shot or have an intermediate shot on the line in between the two shots.


A still from Goodfellas (1990)

The 30 Degree Rule
The 30 degree rule indicates that if two shots of the same location or action are edited together, the camera should move position by at least 30 degree or the shot size should radically change. If this does not happen then the effect is a jump cut. The elements within the shot appear to jump slightly producing a disconcerting effect on the viewer.

Tuesday, November 14, 2006

Film Editing

Editing is the creative force of filmic reality...and the foundation of film art.

V.I. Pudovkin, 1915


After the completion of filming, the final stage is film editing - the selection and piecing together of shots to form the completed film. Just as a range of choices exists for the cinematographer when manipulating light and using a camera, so editing offers many possibilities.

Continuity Editing
One of the key principle is continuity editing. Most films, in one way or another, attempt to have us fully engrossed in what we see. The intention is that we escape into the film for the duration of the screening. The concept of ‘willing suspension of disbelief ‘sums up the experience of much film-going. We know that what we see on the screen isn’t real, in other words, we disbelieve it, but in order to fully engage with the film we willingly suspend that disbelief – we happily ignore our doubts about the authenticity of what we see. We allow ourselves to enter the world (the digenesis) of the film.


In order that we can experience films this way, it is important that we are not reminded that we are watching a film and that we are not confused by an incomprehensible presentation of events in the narrative. Annette Kuhn writes: ‘Continuity editing establishes spatial and temporal relationships between shots in such a way as to permit the spectator to “read” a film without any conscious effort, precisely because the editing is “invisible”, (in Cook and Bernink, 1999, p.40). For this to be possible, it is essential that the shots flow smoothly from one to another and that our attention is not drawn to the edit points. In effect, the shots support each other. One shot logically leads to the next and to a degree we expect the next shot: there is continuity between one shot and the next. A number of techniques help make this possible.

Movement and Speed of Editing
To ensure such ‘transparent’ editing, it is necessary that the locations, props, actors and movement in one shot are consistent with what has gone before. The speed at which some thing happens and the space within which it occurs should be consistent across the relevant shots. In effect, continuity editing supports the meanings produced by the audio/visual interpretations of the narrative.

This principle can be illustrated by reference to a scene mentioned previously, the climactic moment in Cinema Paradiso when Salvatore rescues Alfredo from the fire that has started in the cinema projection room. The pace of editing is fast, people are panicking, events move with speed. Within this scene there is a consistency with regard to time and movement and similarly there is a consistency in the locations and space within which the events unravel. Failure to maintain this consistency would interrupt our involvement in the film and draw attention to the artificial and constructed nature of film.

Shot /Reverse Shot Editing
Film Editing also helps to clarify situations by joining together shots from different angles to provide us with different perspectives, thereby creating a fuller understanding. This is common during conversations where a shot/reverse shot edit is frequently used. The shots themselves are often over the shoulder shots in which we see part of the back of one person’s head and shoulders and the front of the other person talking to them. The editing provides an understanding of the spatial relationship between the characters while also giving information on movement and facial expression..ale is a consistincy a prjectiion the clilmactic moment in Cinema Paradiso when Sayediting establishesents in the narrative. Annette Kuhn writes : 'hing a film and that we are not confused by an incomp


Shot size and Editing
This particular scene also serves to illustrate another common principle behind editing, the use of a variety of shot sizes. On one level a variety of shot sizes helps maintain our interest visually through avoiding repetition, but it also serves another function. We have already noted the various meanings that shot sizes can produce, and through editing a logical progression is created out of shot size. In the scene from the above example we are provided with an extreme long shot of the village and cinema to provide context. The shots are then edited together to eventually take us onto a more personal level as we see Salvatore in extreme close up battling his way through the crowds to Alfredo.

End of post. Film Editing shall be continued in the next one

Sunday, November 12, 2006

Aspects of the Fictional Film

In this post we'll briefly discuss what a narrative is, and then we shall examine major aspects of the fiction film: structure, time and style.


Narratives

  • A Narrative — in film and in other texts — may be defined as a representation of a series of unified events(represented actions and happenings) that are situated in one or more settings.

  • A narrative may be factual or fictional or a blend of the two. It may be chronological or non-chronological.


    Pulp Fiction (1994); the perfect example of a non-chronological fiction


Structure

  • A fictional film is a narrative film including at least one character (imaginary person) and largely or entirely imaginary events its settings may be factual or imaginary.

  • In fictional films, usually the major characters have one or more goals but face problems in trying to reach them.

  • Short fictional films typically have only one or two major characters that do not change much during the film’s brief story time. The major characters of a short have a goal or goals, have obstacles to overcome, and succeed or fail in reaching the goal.

  • Typically, the beginning of a fictional film does not supply much exposition, although it usually establishes where and when the story begins. It also attempts to involve audience in the story.

  • Among other functions, the middle section of a film shows how the central characters deal with problems that impede progress toward their goals and reveals how happenings and the characters actions affect them and others.

  • The ending of a fictional film usually shows the consequences of major previous events. In stories with closure, by the end of the narrative the consequences of previous major events are shown or clearly implied. Most films of classical Hollywood cinema have closure, but many other narrative films do not.

  • A plotline is a brief narrative focused on a few characters or people that could function on its own as a separate (usually very brief) story. Typically, short films have only one plotline, and feature films have multiple plotlines.

  • In feature films, many combinations of plotlines are possible. For example, plotlines can be consecutive but with large gaps of story time between different time periods, or can be chronological and simultaneous and occasionally intersect.
Time
  • Flashforwards are used only occasionally in fictional films, usually to suggest a premonition or inevitability. Flashbacks are often used and can serve many different purposes, such as showing how a character’s past has influenced the character or continues to trouble the character. On rare occasions, fictional films combine present-tense action with flashforwards and flashbacks.

  • A fabula is the mental reconstruction in chronological order of all the events in a non-chronological plot. Although a non-chronological plot contains the same events as its corresponding fabula, the plot creates different emphases and causes different responses in viewers.

  • How much time is represented in a fictional film (story time) is usually unspecified and difficult to determine, but story time nearly always far exceeds the film’s running time.

Style
  • A style is the way that subjects are represented in a text, such as a film. A film may use a style only occasionally or throughout.

  • If viewers know nothing about a film’s style such as black comedy, and cannot figure it out quickly, the film will probably not engage them. If viewers know about the film’s style yet refuse to accept it, they will also likely fail to become engaged by the film.

Saturday, November 11, 2006

Use of Sound in Films

During the 1986 Academy Awards ceremony, a clip from Chariots of Fire (1981) was shown of young men running on a beach accompanied by the sounds of feet splashing in water. Although the soundtrack may have been true to life, it was uneventful. Then the same footage was shown with the film's famous title music. The effect was so different that viewers felt as if they were seeing different footage.. The runners gained the grace of dancers, and action became special, more than life. It illustrated the importance of sound to the creation of vibrant cinema.


In movies, sounds usually seem lifelike. However, as with visuals, what seems true to life is an illusion. If you study sound in movies, you will notice that sounds we would normally hear are often omitted or replaced by music In movies, we do not question such sounds. (yet another movie convention). What are a few of the many ways that film sounds are created, how are film sounds often used, and, most important, how do they affect viewers? Lets check out the kinds of sounds used in films and their uses:

Spoken Words
  • In films, spoken words may take the form of dialogs, monologues, or narration.
  • Overlapping dialogue can create or reinforce a sense of nervousness, stress, and isolation.
  • Spoken words, such as those by Darth Vader, may be distorted for effect.
  • Dialogue is invaluable for revealing a character’s ideas, goals, and dreams, though often it does so more concisely, obliquely, and revealingly than conversation in life does.
  • Although spoken words can be extremely expressive, many films and many film scenes rely heavily on visuals and use only limited spoken words.
Sound Effects
  • Sound effects consist of sounds that objects make, sounds that people make other than spoken words, and ambient sound.

  • Some of the many possible uses of sound effects are to help create a sense of location, intensify a mood, enhance a humorous situation, or conceal an action.

  • Sound effects specialists have many options in manipulating sounds, such as playing them backward, playing them faster or slower than they were recorded, constructing them, and blending them in different proportions.

A still from the movie The Sound of Music
Music
  • Film music may serve countless functions, such as to mirror a film’s central conflict, direct viewers’ attention, establish place and time, suggest what a character feels or an animal is like, and cover weak acting.

  • Film music may reference earlier film music. Sometimes the same music is used; other times an approximation is composed and used.

  • In large-budget movies, sometimes the film music is selected with an eye to future recorded music sales.

Silence
  • Possible uses of silence in films include during dreams, to suggest dying or death, or to interrupt the regular rhythms of life’s sounds.

Transitions
  • There are many possible ways to use sound between shots, such as to have the sound of the first shot end as the shot does.

  • Sound transitions between shots are used to reinforce continuity or contribute to discontinuity. and dreams, though often it does so more concisely, obliquely, and revealingly than conversation in life does.

Sounds in narrative films may come from on-screen or offscreen and may derive from a source in the story or outside the story.

Thursday, November 09, 2006

EDITORIAL REQUIREMENTS

All footage submitted to a film editor must meet three requirements:

TECHNICAL

AESTHETIC

NARRATIVE


TECHNICAL REQUIREMENTS
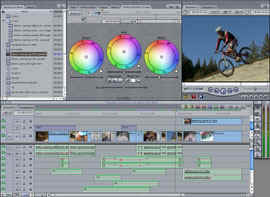
The technical elements of a film — such as photographic treatment, lighting, color, exposure, sound, etc. — should be uniform in production quality. No noticeable visual or audio differences should be apparent when the picture is assembled, and a properly timed and balanced release print made. A mis-match or distracting change, unless deliberately inserted for a special effect, may disturb the audience. A poorly recorded stretch of sound, a perceptible change in lighting, unbalanced color; or any other technical discrepancies are unacceptable. Excellent craftsmanship is taken for granted in professionally-produced theatrical films. If serious non-theatrical film makers expect their films to receive proper audience attention, they should strive for professional quality.


No noticeable visual or audio differences should be apparent in a
professional film. Lighting, color, exposure, sound, etc, should be
uniform in production quality in a properly timed and balanced
release print. Technical discrepancies are distracting, and break
the story telling spell.
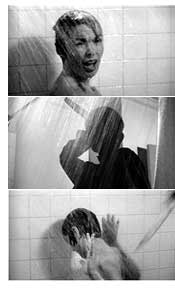
AESTHETIC ELEMENTS
The assembled picture should unreel in a series of moving images, pleasing to watch and easy to understand, unless the film maker desires – for story purposes- to shock or distract the audience: or otherwise create a violent or unpleasant audience reaction. Scenic compositions, player and camera movements, light effects, choice of colors, camera treatment and other pictorial aspects of settings, costumes, backgrounds and props should all be integrated on the basis of their cumulative result when the scenes are finally edited. The good cameraman strives to produce the most beautiful moving images possible. However it is often better under documentary conditions, to present a realistic rather than a pictorially beautiful picture. This does not imply that beauty and realism cannot be combined; or that non-theatrical films must be photographed in a dull, unimaginative, mechanical style. It simply means that documentary subjects should be representational rather than dressed up for picture purposes. Engineering, military, educational, business, industrial in-plant, and other non-theatrical films should be as beautiful as possible, within realistic confines. Pictorial elements involved should be handled in an esthetically suitable fashion, without stealing the show from the subject. The primary aim of a documentary is to “sell” the subject, not the photography.


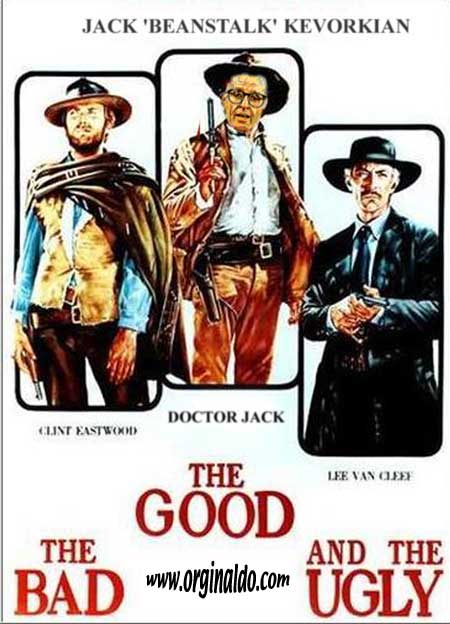
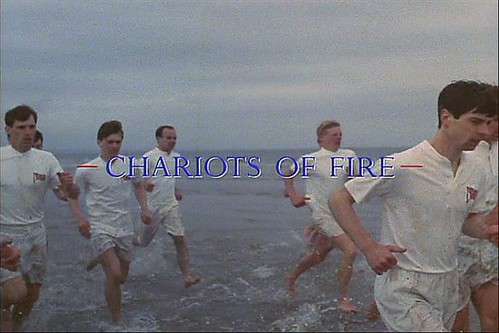
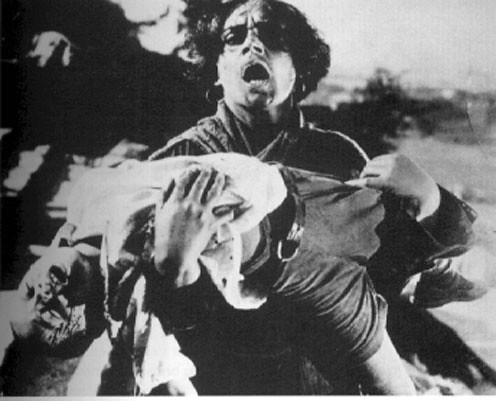
Non-theatrical films should be as pictorially beautiful as possible
within realistic confines. This is a shot from the famous documentary
Fahrenheit 9/11

NARRATIVE FACTORS
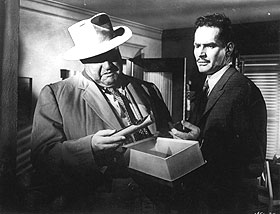
Technically perfect, excellently-composed shots have little or no meaning if the picture is presented in an illogical, uninteresting or incoherent manner. The audience should neither be confused nor have to strain to follow subject themes, unless plot deviations will help for narrative purposes.

Story problems are not the main concern of cameramen shooting from prepared scripts. But the non-theatrical cameraman/director, shooting on his own from an outline, or a few notes, must be sure that his footage can be assembled into a story-telling motion picture. This calls for thorough understanding of story values, audience reaction and editorial requirements. Even the simplest documentary film must capture the audience’s interest and hold its attention as the film unreels. After the theme or plot is introduced and developed, the narrative must build in interest as it progresses. Each shot should make a point. All scenes should be linked together so that their combined effect, rather than their individual contents, produces the desired audience reactions.

Film editors have a motto: "Make them laugh or make them cry, but make them care!"
is introduced and developed, the narrative must b

Wednesday, November 08, 2006

Filming Techniques

Filming Techniques can be broadly classified into two types:

  • MASTER SCENE
  • TRIPLE TAKE

MASTER SCENE TECHNIQUE

A master scene is a continuous take of an entire event occurring in a single setting .It is a complete chronological motion picture- silent or sync sound - of over – all action, from beginning to end.

If filmed with a single camera: portions of the action are later repeated to obtain inter-cutting closer shots.

If filmed with multiple cameras: inter-cutting closer shots are filmed simultaneously.


A scene from the film noir A few Bad Cops


HOW TO USE MASTER SCENE TECHNIQUE

Theatrical films: Generally filmed with a single camera because the action is staged, and may be repeated any number of times ; in order to shoot medium shots, two-shots, over-the-shoulder shots and individual close-ups required for inter-cutting .Closer shots are set up and lighted to portray the players best from that particular angle. Both action and dialogue are overlapped for each shot.

Television films: Dramatic television films are generally filmed in the same manner as theatrical pictures. Situation comedies and similar “stage-front” material—in which actors perform for audience as if on-stage—are filmed with multiple cameras, to record all angles simultaneously.

Non-theatrical films: Controllable action, such as staged scenes, may be filmed in a theatrical manner with a single camera and action repeated for closer shots. Uncontrollable action, such as field tests, may be filmed with multiple cameras, to record all angles simultaneously.


Uma Thurman as Mia Wallace in a shot from Pulp Fiction (1994)


TRIPLE – TAKE TECHNIQUE

The simplest method for obtaining shot-to-shot continuity, particularly when filming without a script, is by overlapping the action at beginning and ind of each shot. In this filming technique-commonly termed cutting in the camera-the cameraman thinks of three consecutive shots, regardless of the number of scenes being filmed.

Action at the end of the first shot is repeated at the beginning of the second shot; and action at end of second shot is again overlapped at beginning of the third shot. Triple –take technique is very simple in operation. The cameraman need refer only to ending of the previous shot; and repeat a small part of that action, to match beginning of the shot being filmed Then , the end of the present shot id noted: so that its final action may be carried over to beginning of the next shot.

Therefore, it is not the heart of the action during the shot that must be most closely observed; but movements at beginning and at end of each shot which must be matched to bracketing scenes.

Motion pictures are presented in sequences, not shots. While individual shots have their own value, each must be considered a portion of the sequence, serving only to advance the story. A series of shots must be woven into a coherent sequence, without distracting jumps or breaks in the continuity. The audience should be barely aware of changes in camera angle or image size. As in life, the sequences must appear as a continuous flow of movement, from start to finish. While cheating of both time and space during filming and editing is permissible, it should not be apparent to the audience.

Tuesday, November 07, 2006

Shots, Scenes, Sequences

A shot is an uninterrupted strip of exposed motion-picture film or videotape made up of at least one frame, an individual image on the strip of film or videotape. A shot presents a subject, perhaps even a blank screen, during an uninterrupted segment of time. Typically, a feature film consists of hundreds of shots, sometimes more than a thousand. The original, uncensored version of Battleship Potemkin (1925) owned by the Museum of Modern Art in New York—which runs seventy-two minutes when projected at the silent speed of eighteen frames per second-has 1,346 shots. Toy Story (1995), which is 771/2 minutes long, has 1,623 shots (Grignon). At the opposite extreme, some experimental films consist of a single, often very lengthy shot. Andy Warhol’s Empire (1964), which is seemingly a single shot of a view of the Empire State Building and runs for hours, is an example of this sort of film.


Battleship Potemkin

A scene is a section or a narrative film that gives the impression of continuous action taking place during continuous time and in continuous space. A scene seems to have unity, but editors often delete tedious or unnecessary footage in such a way that viewers will not notice. For example, we may not see every step a character presumably takes in moving within a scene. A scene may consist of one shot and usually consists of two or more related shots, but on rare occasions a shot is used to convey multiple scenes, as in the more than eight minute opening shot of The Player (1992). At various times during that shot, the camera moves closer to certain groups of characters so we can see them interact and then moves to different characters elsewhere nearby. In the opening of The Player, as in the famous opening of Touch of Evil(1958), there is not the usual scene consisting of a shot or shots but a shot consisting of scenes.

Sequence lacks a universal meaning: filmmakers, critics, and scholars often assign it different meanings. And comparison of several published outlines of sequences for the same film reveals different “sequences”. It is most useful to think of a sequence as a group of related consecutive scenes, although what unifies the scenes is not universally agreed on.

PS: You guys must be wondering why the hell I've put up celluloid in a digital filmmaking blog! Well to put it simply - I had to. Especially when talking abut shots, scenes and sequences - the best references could have only been got from celluloid films - the traditional medium. Digital filmmaking; being relatively new, did not have much to offer on this subject. Plus, I think too much limitation is not much of a good thing! On that note,dear readers, ciao and take care.

Sunday, November 05, 2006

Camcorder Lens Filters


Lens Filters can be incredibly useful for changing the characteristics of light before it hits the camera’s beam splitter. Thousands of filters are marketed and sold through camera shops and video supply houses. Before you purchase a filter, make sure to feel the inside lip of your camcorder lens for threads that accept filters and conversion lens. These threads usually come in preset dimensions (52mm, 40mm.33mm, etc.) to coincide with third-party products. The following are just a few of the more common filters:


  • Neutral-density filters. Chances are, your camcorder already has a neutral – density (ND) coating on its lens. By supplementing this coating with addition ND filters, you can prevent harsh light from washing out subjects, particularly strong sunlit backgrounds that seem to overwhelm foreground objects or actors. There are hundreds of varieties of ND filters, and most result in a balanced exposure without affecting a scene’s colors.

  • Diffusion filters. If you want to smooth textured surfaces and wrinkled faces, use a diffusion filter. They are the staple of cinematographers who master the close-ups of aging beauty queens because they spread light across the lens without preventing the camera from focusing on the edges. Tinted diffusion filters further enhance skin tones by suppressing hard details and adding warmth and softness to images.

  • Polarizing filters. To heighten an image’s color and contrast, try using polarizing filters. These filters enhance colors in two ways: They mute the light that washes out reflective surfaces, and they saturate colors to add drama to scenes, particularly those that need areas of sky, water, and windows deepened.

  • Mist filters. Mist filters create the halo effect so overused in motion pictures, particularly in pastoral landscapes. Unlike diffusers, mist filters (and once again, there are hundreds of types) dull the sharpness and contrast of details by highlighting object edges. Great for heightening mood, they’re often used to convey a dreamlike quality.

  • UV filters. By absorbing ultraviolet light, UV filters drastically reduce excessive blue-which means they’re helpful for shooting outdoors when overcast days have removed the warm look from your scene. Many lenses are coated with a UV protection to guard against the damaging effects of dust and scratches, but you can use additional UV filters (tinted in various hues) to block harsh elements of natural light.

Remember, any changes in the optical properties of your camera will result in better overall image resolution than if those same changes were applied through interpolation or post processing software on a computer.

ncredibly useful for changing the characteristics of light before it hits the camera'

Saturday, November 04, 2006

Getting Superior Shots From DV Cameras

The primary goal of digital filmmaking is digital end-to-end production - keeping all of your movie elements in the realm of the zeros and ones. if you take steps to capture the highest possible image quality and keep your source tapes in pristine condition, your digital footage should last a lifetime. Given below are a few DV shooting tips that may come in handy:


Outdoor shots, colorful with a significant dynamic range.


  • Digital stabilization. Digital cameras naturally correct shaky footage through an interpolation process called stabilization. However, this feature can also decrease image quality. The best way to get stable footage is by using a steady hand or a trusty tripod. Keep your shots firm and fluid –especially during tilting and panning movement – and you’ll prevent the camera’s innate digital technology from overcorrecting your footage.

  • 16:9 format. Many digital cameras include a feature that records images in Hollywood-style letterboxed format—a ratio referred to as 16:9-with black bands across the top and bottom of the video footage. Unfortunately, lower – end cameras achieve this effect by clipping portions of the sensor, recording less pixel inameras achieve this effect by clipping portions of the sensor,recording less pixelinformationd tripod.Keep formation overall. Unless your camera has ‘native’ 16:9 high-definition capability, you should avoid using this feature.

  • Picture effects. Today’s digital cameras are able to instantly convert footage to stylized images: black and white, sepia tone, mosaic patterns, and so on. These picture effects, however, seriously alter the data of your original footage. What’s more, when recorded in this mode, these effects are irreversible. If you intend to colorize or add effects to your footage, do so within computer applications designed for this use and keep your source footage clear and free of these processed effects.

  • Digital Zoom. Digital zoom changes the size of the object in view but degrades overall resolution. This is because once you exceed the range of optical zoom, the digital processor takes over and begins interpolating pixel information-a process that can be detrimental to your final footage, creating blocky and discolored scenes. To protect the clarity and resolution of your images, keep the focus and zoom within the range of the optical lens.

  • Tape speed. Many videotape manufacturers sell tapes that extend recording time by slowing tape speed. This, too, can be detrimental to overall picture quality. To ensure the highest resolution of DV footage , always use the fastest tape speed setting, commonly referred to as standard play (SP).

Although electronics manufacturer's go to great lengths to give you as many creative and technical options as possible, some of your camcorder's automated features can inadvertently remove valuable pixel information. However, by being aware of the above, you should be able to prevent that from happening.

Friday, November 03, 2006

The Right Camera for Film Transfer

There are several issues you must weigh when purchasing a camcorder for the purposes of film transfer. 

If, for example, your ultimate goal is to someday have your video projected from celluloid in a movie theater, you’ll need to consider shooting your source footage at 25 frames per second, which will make for a smoother transition to the 24 frames of traditional film stock. To do this, you’ll need a PAL-formatted camcorder (commonly sold in European markets) rather than a camera that shoots at the standard 30 frames per second.

In addition, if you’re interested in widescreen projection, there are some cameras specifically designed for capturing images in the elongated 16:9 aspect ratio. These considerations are critical to your success with video-to-film projects, so carefully examine any prospective camcorder for the appropriate features and consult a film transfer facility to see what they recommend.

It would be smart to create an online backup of your film in case it's lost. It also makes it more convenient to access

Sony HDW-F900 Sony was the first company to manufacture a DV camcorder that recorded images at 24 progressive frames per second - an ideal aspect ratio for video projects that will eventually be transferred to film, because it doesn't necessitate dropping frames when converting formats.

24P
The most direct way to transfer progressive frame video to film stock is using a 24P camera. This camera records one complete image scan for each frame of celluloid. Pioneered by Sony, and now available from several makers, this technology has the ability to record 40 minutes of HD footage on a compact $70 cassette (compared to the $400 for 4-minutes of 35mm motion picture film, with processing costs). The 24 frame progressive camera provides an even higher image quality than standard HD camcorders through increased vertical resolution and the elimination of any interlaced-associate aliasing.

Progressive-Frame Cameras

Typically video cameras record each frame as an interlaced composite of two fields captured 1/60th of a second apart: Each field holds every other line of resolution in a single video frame. Progressive-frame camcorders, in contrast, do not skip lines when recording video: they record each frame as an entire still image , gathering the data on every line on the CCD.

Interlaced video comprises 60 fields of data per second: however, none of those fields holds all of the lines from the CCD at any single moment .By combination the lines of one field with the lines of another, the camera is able to create 30 full frames, which approximate all of the motion captured through the lens. This operation is mainly due to the rate at which television sets are able to play back video. Some manufacturers understand, however, that videophiles may want to achieve a more cinematic effect by approaching film’s standard24 –fps rate. This can be achieved by scanning 30 complete images (not half frames) onto the CCD and duplicating each to create 60 fields. This is how progressive scan images are made.

Some camcorders feature a faux progressive-frame mode (on Canon models it’s called Frame Movie mode). Instead of providing a true progressive scan, these cameras interpolate field lines to achieve a 30-fps effect—which, though impressive, actually reduces resolution slightly, presenting a problem if you intend to transfer to film someday.

True progressive-scan cameras retain all scan lines and vertical resolution for the stated shutter time, and then use this single image to form both fields of the video frame.